Analyzing images for color information is often a key step in retrieving and personalizing content. For example, a shopping app might let users narrow down search results for clothing by color, and a news reader could use the primary color in an article’s images for links and headlines.
While a basic color detection algorithm that builds up a frequency table of an image’s colors is a natural first step in solving this problem, in practice you find yourself coming up with arbitrary thresholds and heuristics to get good results. Taking the machine learning approach and using clustering algorithms turns out to be a great alternative, and a more principled solution to the problem.
Two years ago, I started working on LearnKit, a high-performance iOS and OS X machine learning library that makes using common machine learning algorithms in Cocoa [Touch] software fast, fun, and easy. In fact, as of LearnKit 1.5.1, finding the key colors in an image using a clustering algorithm can be done in under ten lines of code.
In LearnKit, all datasets are represented with matrices. We start by initializing a new LNKMatrix with an image’s pixels as the data points. The format flag indicates the alpha channel should be ignored (the image is fully opaque anyway).
NSURL *fileURL = ...;
LNKMatrix *matrix = [[LNKMatrix alloc] initWithImageAtURL:fileURL format:LNKImageFormatRGB];
We’ll use the following image of the Schönnbrunn Palace (courtesy of Michael Wifall) in this example.
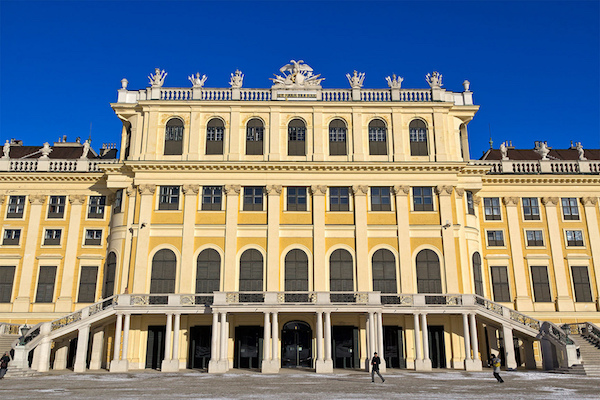
Now that we have a data matrix, we need to initialize a clustering algorithm. We’ll use an iterative K-Means classifier to find the two clusters of the image. Since we’re working with RGB data, the two cluster centers will correspond to the two key colors.
LNKKMeansClassifier *classifier = [[LNKKMeansClassifier alloc] initWithMatrix:matrix
														   implementationType:LNKImplementationTypeAccelerate
														optimizationAlgorithm:nil
																	  classes:[LNKClasses withCount:2]];
classifier.iterationCount = LNKSizeMax;
The iteration count of LNKSizeMax indicates the algorithm should run until convergence. If you’re working with particularly large images, this could be set to a fixed value to cut off the search early, though it’s unnecessary for this example.
Next, we run the algorithm by calling the -train method LNKKMeansClassifier inherits from LNKClassifier.
[classifier train];Training should not take long – on my 2013 15” Retina MacBook Pro, analyzing the image above took around 0.06 seconds.
After training is complete, we can retrieve the top two cluster centers, which correspond to our top two primary colors:
LNKVector color1 = [classifier centroidForClusterAtIndex:0];
LNKVector color2 = [classifier centroidForClusterAtIndex:1];
These are both vectors of length 3, with elements corresponding to the R, G, and B channels.
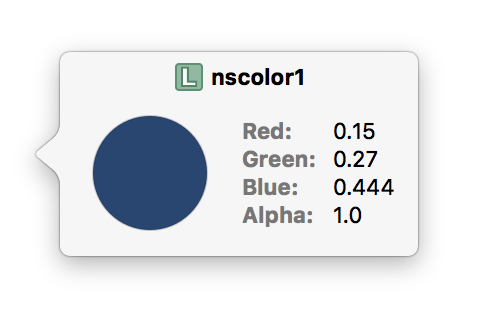
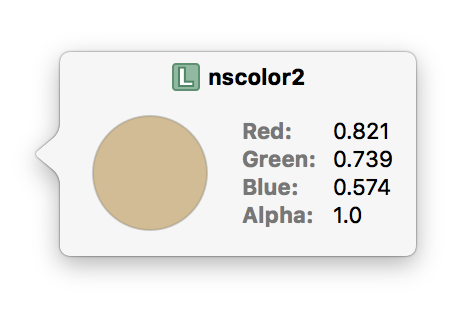
We can easily convert these vectors to NSColor instances on the Mac (or UIColors on iOS):
NSColor *nscolor1 = [NSColor colorWithSRGBRed:color1.data[0] green:color1.data[1] blue:color1.data[2] alpha:1];
NSColor *nscolor2 = [NSColor colorWithSRGBRed:color2.data[0] green:color2.data[1] blue:color2.data[2] alpha:1];
This allows us to take advantage of Xcode’s support for (debugger) Quick Looks. Sure enough, when we hover over the variables, we see the top two colors we’d expect corresponding to the sky and building facade: